Archives
-
▼
2013
(162)
-
▼
February
(20)
- Sweet Irish Temptations
- Happy St. Patrick's Day
- "Free Spirit"
- Let's Party
- Radiant Dorianne - PTU
- Love is always Sweet - PTU
- Evil Andy Ann
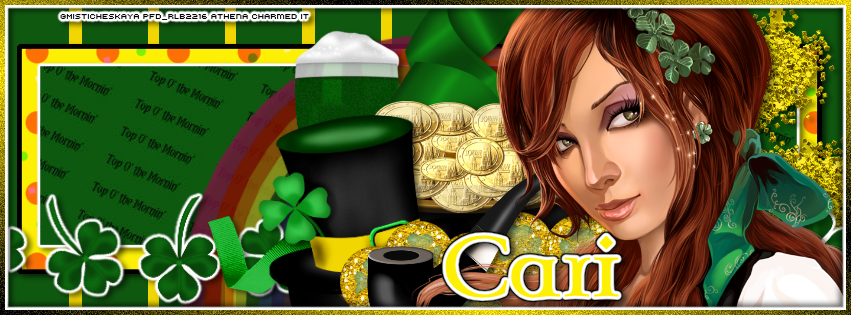
- Pot Of Gold Facebook Timeline Cover
- Luck Of the Irish PTU Tut
- People Wonder
- Love Addicted PTU TUT
- Love Me Now
- Love Is In The Air
- Spring In The Air
- Roses Are Red PTU
- With all My Heart PTU
- New PTU Tutorial " L..O.V.E. "
- BWC PTU Kit Goddess Of Love
- New PTU Tutorial " Valentine Love "
- Princesita
-
▼
February
(20)
Thursday, February 28, 2013
Tuesday, February 26, 2013
For this Tutorial I am using the work of
If using these tubes make sure you have the proper licenses.
You can purchase her work from
I am using a “PTU” Scrap kit “Pot Of Gold”
you can find this kit at
Any mask you like should do well.
Lets get started …
New Image – 700 x 700
BWC_Potofgold Paper 1 copy – paste as new layer
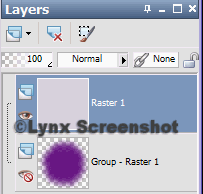
Layers – Load /Save Mask
Load Mask From Disk
Create Mask from : Source Luminance
Orientation : Fit to Canvas
Options: Hide all mask
Ok
Merge Group
I am using BWC_ Potofgold Paper 2
Copy and Paste as new layer
Add BWC_Potofgold Element #36
Add your tube resize if needed
Highlight BWC_Potofgold Element #36
Click inside with your Magic Wand
Invert
Duplicate Frame
Move above tube
Highlight BWC_Potofgold Element #36 on top of tube
Erase the top element where you want the tube to be coming out of.
Eraser Tool
Size 20%
I choice the her head.
Deselect - Ctrl+D
Now Highlight your tube
Using same setting with the eraser
Erase the bottom part of your tube below the Element.
Highlight your bottom element
Selections – Modify – Expand
Expand by 3 – Invert (Crtl+Shift+I)
Highlight BWC_ Potofgold Paper 2
Delete - Deselect - Ctrl+D
Highlight top element
Drop Shadow
Offset V: 2 H: -2
Attributes
Opacity: 75
Blur: 5.00
Color: Black
Highlight your tube
Drop Shadow
Offset V: 2 H: -2
Attributes
Opacity: 75
Blur: 5.00
Color: Black
Highlight your bottom element
Drop Shadow
Offset V: 2 H: -2
Attributes
Opacity: 75
Blur: 5.00
Color: Black
Close out of the mask background
Now Merge Visble
Remove the X from your background & Mask.
Add BWC_Potofgold element 28 as New Layer
Add BWC_Potofgold element 3 as New Layer
Resize BWC_Potofgold element 3 down to 50%
Same Drop Shadow as above
Merge All Layers Visble
Now resize your tag to whatever size you want
I resized mine to 500 x 500
Adjust – Sharpness – Sharpen
Now new layer and add you copyright info. and your name.
Would love to see your results.
Friday, February 22, 2013
For this Tutorial I am using the work of
If using these tubes make sure you have the proper licenses.
You can purchase her work from
I am using a ” FTU” Scrap kit “Free Spirit”
you can find this kit at
Any mask you like should do well.
Lets get started …
New Image – 800x800
BWC_Freespirit Paper 2 copy – paste as new layer
Layers – Load /Save Mask
Load Mask From Disk
Create Mask from : Source Luminance
Orientation : Fit to Canvas
Options: Hide all mask
Ok
Merge Group
I am using BWC_Freespirit Paper 9
Copy and Paste as new layer
Add BWC_Freespirit_Frame 3
Resize it too 700 x 700
Copy – Paste as new layer
Then resize it 85 %
Highlight Frame
Click inside with your Magic Wand
Invert
Duplicate Frame
Move above tube
Highlight top frame top of tube
Erase the top frame where you want the tube to be coming out .
Eraser Tool
Size 20%
Drop Shadow
Offset V: 2 H: 2
Attributes
Opacity: 50
Blur: 5.00
Color: Black
Close out of the mask background
Now Merge Visble
Remove the X from your background & Mask.
Add BWC_Freespirit Purple Charm Heart as New Layer
Resize 50%
move to the right
Rotate 15%
Left All Layers unchecked
Same Drop Shadow as above.
Now add all your extras you want to add re-size if needed.
I add the BWC_purple Sparkle twice
Merge All Layers Visble
Now resize your tag to whatever size you want
I resized mine to 500 x 500
Adjust – Sharpness – Sharpen
Now new layer and add you copyright info. and your name.
Would love to see your results.
Thursday, February 21, 2013
Wednesday, February 20, 2013
Tuesday, February 19, 2013
Monday, February 18, 2013
Sunday, February 17, 2013
Luck Of The Irish
You can find this PTU Tut over at my blog below
Hope you all will come take a look & enjoy the tut
Xoxo,
Kimmie aka Kimmilicious
Friday, February 15, 2013
Tuesday, February 12, 2013
Love Addicted
Using this PTU kit was fun and i enjoyed working with this kit.
You can find my tut at my blog Below
Hope you all enjoy :)
Xoxo,
Kimmie aka Kimmilicious
Monday, February 11, 2013
For this Tutorial I am
using the work of
If using these tubes
make sure you have the proper licenses.
You can purchase her
work from
I am using the FTU
Scrap kit “Love Is In The Air”
you can find this kit
at
This Mask I am using is
called “ Monti's Circle Mask “
You can find at
You will need no
Filters
Only PSP Noise
Lets get started ...
New Image – 700x700
Color White
Copy BWC_Loveisintheair
paper #14
Paste as New Layer
(ctrl+L)
Layers – Load/Save
Mask – Load Mask From Disk...
Mask : Monti's Circle
Mask
Create Mask From :
Source Luminance
Orientation: Fit To
Canvas
Options: Hide All Mask
OK
Merge – Merge Group
Copy BWC_Loveisintheair
paper #8
Paste as New Layer
(ctrl+L)
Resize 75%
Uncheck Resize all
Layers
Add BWC_Loveisintheair
Element #19
Highlight
BWC_Loveisintheair Element #19
Click inside with your
Magic Wand
Selections – Modify –
Expand by3
Invert
Highlight
BWC_Loveisintheair Paper #8 – Delete
Selections – Select
None (Deselect)
Add your tube
Highlight
BWC_Loveisintheair Element #19
Duplicate
BWC_Loveisintheair Element #19
Move one above your
tube
Highlight the top
BWC_Loveisintheair Element #19
Click inside with your
Magic Wand
Click on your Eraser
Tool – Change size to 75%
On the
BWC_Loveisintheair Element #19 above the tube
Erase so the head is
coming out of the frame.
Selections - Select None (Deselect)
X out of your
background & Mask
Highlight
BWC_Loveisintheair
Element #19
Drop Shadow
V: 1 H: -1 Opacity: 50
Blur: 3.00
Highlight Tube same
Drop Shadow
Highlight Top
BWC_Loveisintheair Element #19 Same Drop Shadow
Add BWC_Loveisintheair
Element #47 resize 75% same as above
Same Drop Shadow
Merge Visble
Reopen your Background
& Mask
Resize to 500 x 500
Check Resize all Layers
Now new layer and add
you copyright info. and your name.
To get your Fonts like
mine
Size: 72 pixels –
Bold – Sharp – Stroke length : 1.5
Animation
Under Frame above the
Mask
Add BWC_Loveisintheair
Element #16 resize 75%
Highlight Mask
Duplicate it – Merge
Down
Adjust/Add/Remove noise
Gaussian: 25
Copy Merged or
ctrl+shift+c
Open Animation Shop
paste as new animation or ctrl+v
Back to PSP
Click back arrow
Adjust/Add/Remove noise
Uniform: 25
Copy Merged or
ctrl+shift+c
Back to Animation shop
Paste after current
frame or shift+ctrl+L
Keep frame properties
at 10 and save as gif.
Would love to see your
results.
For this Tutorial I am using the work of
If using these tubes make sure you have the proper licenses.
You can purchase her work from
I am using a ” PTU” Scrap kit “ Spring In The Air ”
you can find this kit at
Any mask you like should do well.
Lets get started …
New Image - 700x700
BWC_Springintheair Paper 9 copy – paste as new layer
Layers – Load /Save Mask
Load Mask From Disk
Create Mask from : Source Luminance
Orientation : Fit to Canvas
Options: Hide all mask
Ok
Merge Group
I am using BWC_Springintheair Paper 8
Copy and Paste as new image
Add BWC_Springintheair_EL 41
Copy – Paste as new layer
Highlight El 41
re-size at 75% if needed with your tube
Click inside with your Magic Wand
Invert
Duplicate El 41
Move above tube
Highlight Element 41 top of tube
Erase the top element where you want the tube to be coming out of.
Eraser Tool
Size 20%
Erase the EI 41 on what part you want to be showing out of the frame.
I choice the butterfly.
Drop Shadow
Offset V: 1 H: -1
Attributes
Opacity: 50
Blur: 3.00
Color: Black
Close out of the mask background
Now the rest Merge Visble
Remove the X from your background & Mask.
Add BWC_Springintheair Element 11 re-size 50%
move to the right
Rotate 15%
Same Drop Shadow as above.
Now add all your extras you want to add re-size if needed.
Re-size Your frame at 85%
Adjust – Sharpness – Sharpen
I am going to use Element 23 to go behind the frame
Resize 85%
Duplicate – Mirror – merge down
Duplicate – Flip – merge down
Now new layer and add you copyright info. and your name.
Would love to see your results.
Thursday, February 7, 2013
Come check out this Tut : Roses are Red: PTU
From Cari's "Roses are Red" kit Here
Hugs
Angie AKA : " Angelia's Garden"
From Cari's "Roses are Red" kit Here
Hugs
Angie AKA : " Angelia's Garden"
Come Check out this Tut: Using Cari's
"With All My Heart" Kit Here
Hugs
Angie aka "Angelia's Garden"
Sunday, February 3, 2013
Subscribe to:
Comments
(Atom)
